Intermatic
Schakelaar
HB880R
Intermatic HB880R Handleiding
Hier is de Intermatic HB880R (Schakelaar) gebruikershandleiding. 2 pagina's in taal Engels met een gewicht van 476,214.0 Mb. Als u geen antwoorden op uw probleem kunt vinden Vraag het onze community.
Pagina 1/2
MODEL HB880R
WARNING
Risk of Fire or Electrical Shock
• Connect only to an outdoor receptacle protected by a Ground Fault
Circuit Interrupter (GFCI).
• Connect only to an outdoor receptacle with a “while in use” weatherproof
cover.
• Mount at least 24 inches (0.6 meters) above ground level with receptacles
facing downward.
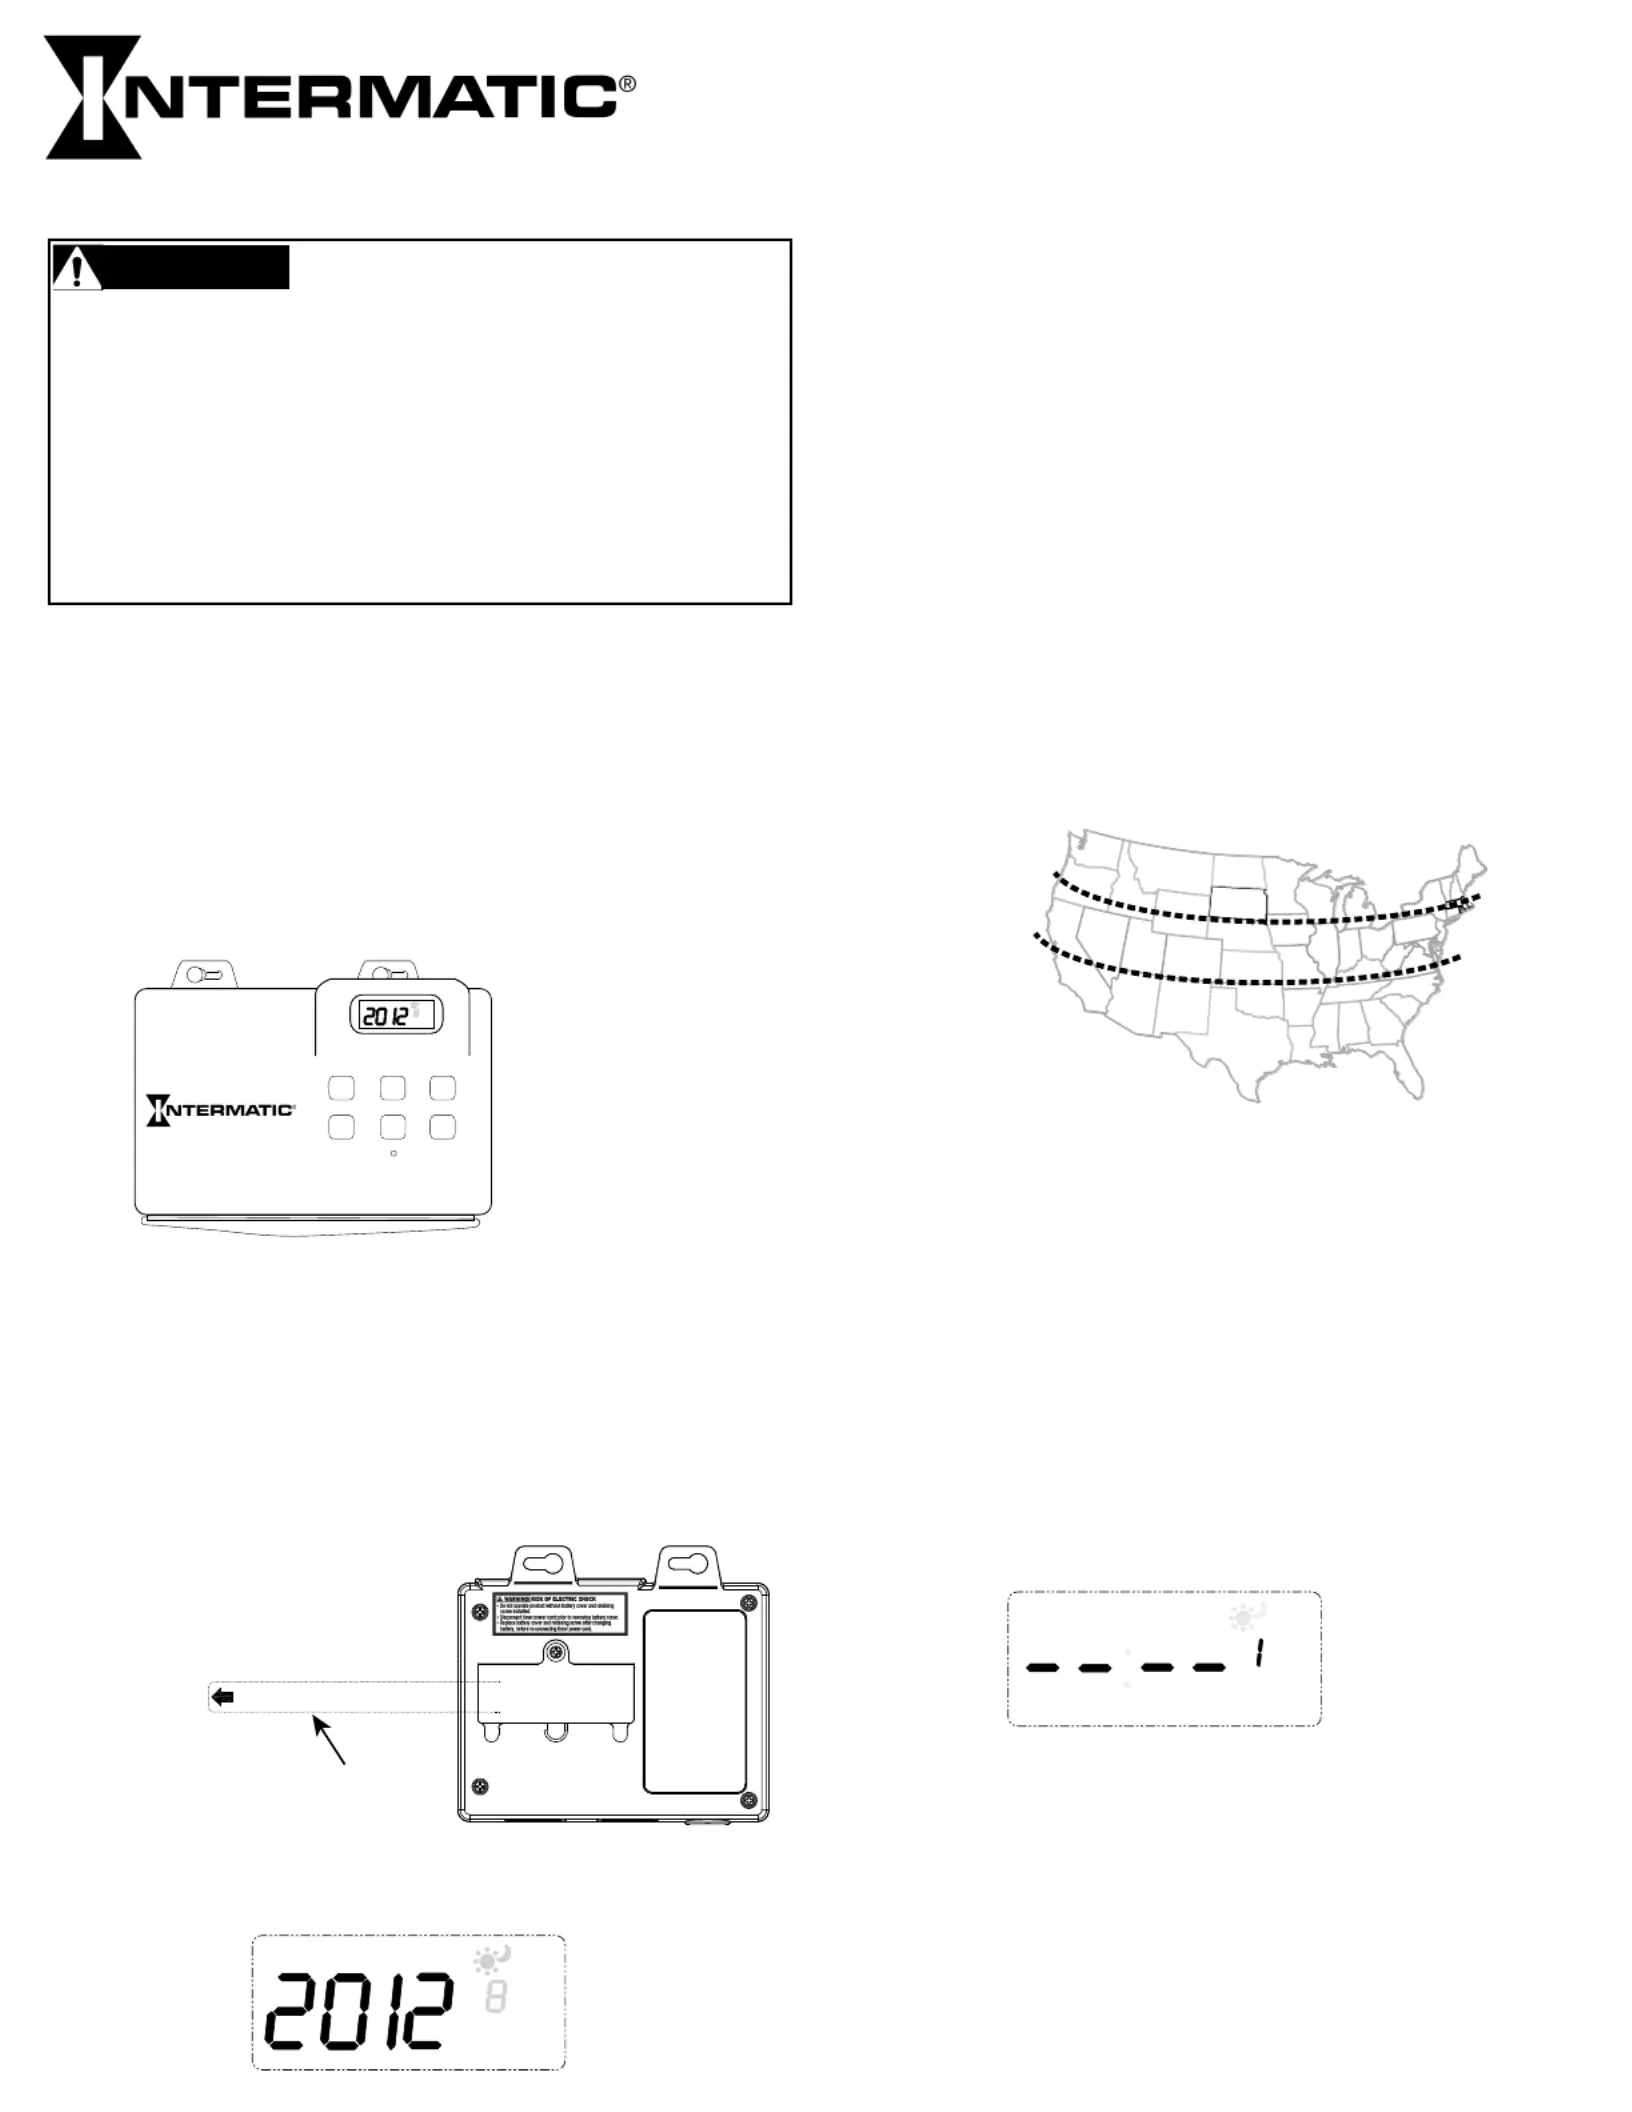
• Unplug timer power cord before opening the battery compartment.
• Replace battery cover and retaining screw before plugging in timer cord.
• Do not use timer if battery cover and/or retaining screw is missing or
damaged.
• Do not exceed rated capacity of connected extension cord or timer.
Specifications
• Input Voltage: 120 VAC, 60 HZ
• 15 Amps General Purpose
• 1000 Watts Tungsten
• 1/2 Horsepower
• 8.3 Amps Ballast (Standard) (Inductive)
• 500 VA Electronic Ballast
Description
The HB880R Time Switch is a programmable digital timer for outdoor
applications. Astronomic settings adjust for seasonal changes. Auto-
matic Daylight Saving Time adjustment. Follow these instructions to
complete the programming for the HB880R time switch.
Enable the Battery
1. On the back of timer, pull out the pull tab (if present) from
the battery holder. See Figure 2.
2. Verify that the controller display activates.
3. Take one of these actions.
IF THE DISPLAY THEN...
Activates Go to Setting the Calendar,
Clock and Astro Time
Does not activate Replace Battery. See
Replacing Battery on page 2.
Setting the Calendar, Clock and Astro Time
NOTE: The timer does not have to be plugged in to set the timer.
1. Press DATE/TIME/NEXT. The year ashes.
SELECT
FUNCTION
DATE/TIME
NEXT
SET ON/OFF
EVENTS
RESET
DELETE
+-
MO
PM AUTO
AM RDM
DST
ON
OFF
TU
WE
THFR SASU
7 Day/ 7 Event Outdoor Timer
Pull Tab
Remove stic prior to usi prpla tape ng oduct.
C ery c tacts i no L display.heck batt on f CD
2. Press or to scroll to the current year, then press + - DATE/
TIME/NEXT. The month digit ashes.
The months start with 01 (Jan) through 12 (Dec).NOTE:
3. Press or to select the current month, then press + - DATE/TIME/
NEXT. The day of the month digit and the corresponding day of
the week ashes.
4. Press or to select the current day of the month and then press + -
DATE/TIME/NEXT.
5. From the DST (Daylight Saving Time) screen, press or to set + -
the DST function to or , then press Auto (ON) OFF DATE/TIME/
NEXT. The hour digit in the current time ashes on the screen.
6. Press or to set the current hour (AM/PM), then press + - DATE/
TIME/NEXT. The minute digit ashes.
7. Press or to set the current minute, then press + - DATE/TIME/
NEXT. A ashing “nor” and the Astro icon appears.
8. Using the map in Figure 3 as reference, press or to select your+ -
Astro zone then press DATE/TIME/NEXT to save the zone. The
screen appears. AM sunrise
denotes NORTH, denotes CENTER, and NOTE: nor CEN SOU
denotes SOUTH.
9. From the screen, press or to set the sunrise time, AM sunrise + -
then press DATE/TIME/NEXT. The PM Sunset screen appears.
The setting range is a maximum of / 2 hours. NOTE: + -
Press to restore calculated sunrise time.NOTE: DELETE
10. Press or to set the sunset time, then press + - DATE/TIME/
NEXT. The time of day screen (ashing colon) appears.
The setting range is a maximum of / 2 hours fromNOTE: + -
the automatically calculated sunrise time.
Press to restore calculated sunset time.NOTE: DELETE
Setting Events
This section provides instructions for setting pairs of ON/OFF events.
To set an event pair, you must rst set the ON event and then repeat
the procedure to set the OFF event. You can set up to seven pairs
of ON/OFF events (14 total) in the timer. Follow this procedure to set
timer events.
1. Press . Dashed lines appear to indicate noSET ON/OFF EVENTS
event is set for the event number.
2. Press DATE/TIME/NEXT to set an ON event. The screen
displays 1200 AM 1 ON (for ON event 1).
3. Press + or - to scroll to the days of the week that the event will run.
To set the event to run every: NOTE:
- Week: Select MO, TU, WE, TH, FR, SA, SU
- Weekday: Select MO, TU, WE, TH, FR
- Weekend: Select SA, SU
Press DATE/TIME/NEXT. The hour ashes.
4. Press or to scroll to the desired hour or Sunrise or + - AM PM
Sunset for the event.
The hour can be set with the 12-hour AM/PM format or atNOTE:
Sunrise or Sunset.
MO
PM AUTO
AM RDM
DST
ON
OFF
TU
WE
TH FRSA SU
nor
(NORTH)
CEN
(CENTER)
SOU
(SOUTH)
Figure 1
The HB880R Time Switch
Figure 2
Removing pull tab from battery holder
Figure 3
Astro zone map
Outdoor 7 Day
Digital Timer
Operating and User Instructions
MO
PM AUTO
AM RDM
DST
ON
TU
WE
TH FRSA SU
Probleemoplossing Intermatic HB880R
Als je de handleiding al zorgvuldig hebt gelezen maar geen oplossing voor je probleem hebt gevonden, vraag dan andere gebruikers om hulp
Specificaties
| Merk: | Intermatic |
| Categorie: | Schakelaar |
| Model: | HB880R |