Sharp XEA-206 Handleiding
Hier is de Sharp XEA-206 (Kassa) gebruikershandleiding. 4 pagina's in taal Engels met een gewicht van 0.3 Mb. Als u geen antwoorden op uw probleem kunt vinden Vraag het onze community.
Pagina 1/4
XE-A206 Quick Start Guide
The following describes how to get the cash register ready for operate. Follow these steps before you use the cash register for the first time.
Before you set up the cash register, prepare three new alkaline batteries LR6 ("AA" size) which are necessary for memory backup. Find a stable and flat surface not subject to direct radiation, to place
the cash register.
English
1Initializing the Cash Register
To ensure the cash register operates properly, please use the following
procedure:
1. Make sure the power cord is unplugged and batteries are not
installed on the register.
2. Insert the manager (MA) key into the mode switch and turn it to the
REG position.
3. Insert the plug of the power cord into the AC outlet. The buzzer will
sound three times.
IMPORTANT: This operation must be performed without batteries installed.
4. The cash register has now been initialized.
The register display will show “0.00” with “ ”.
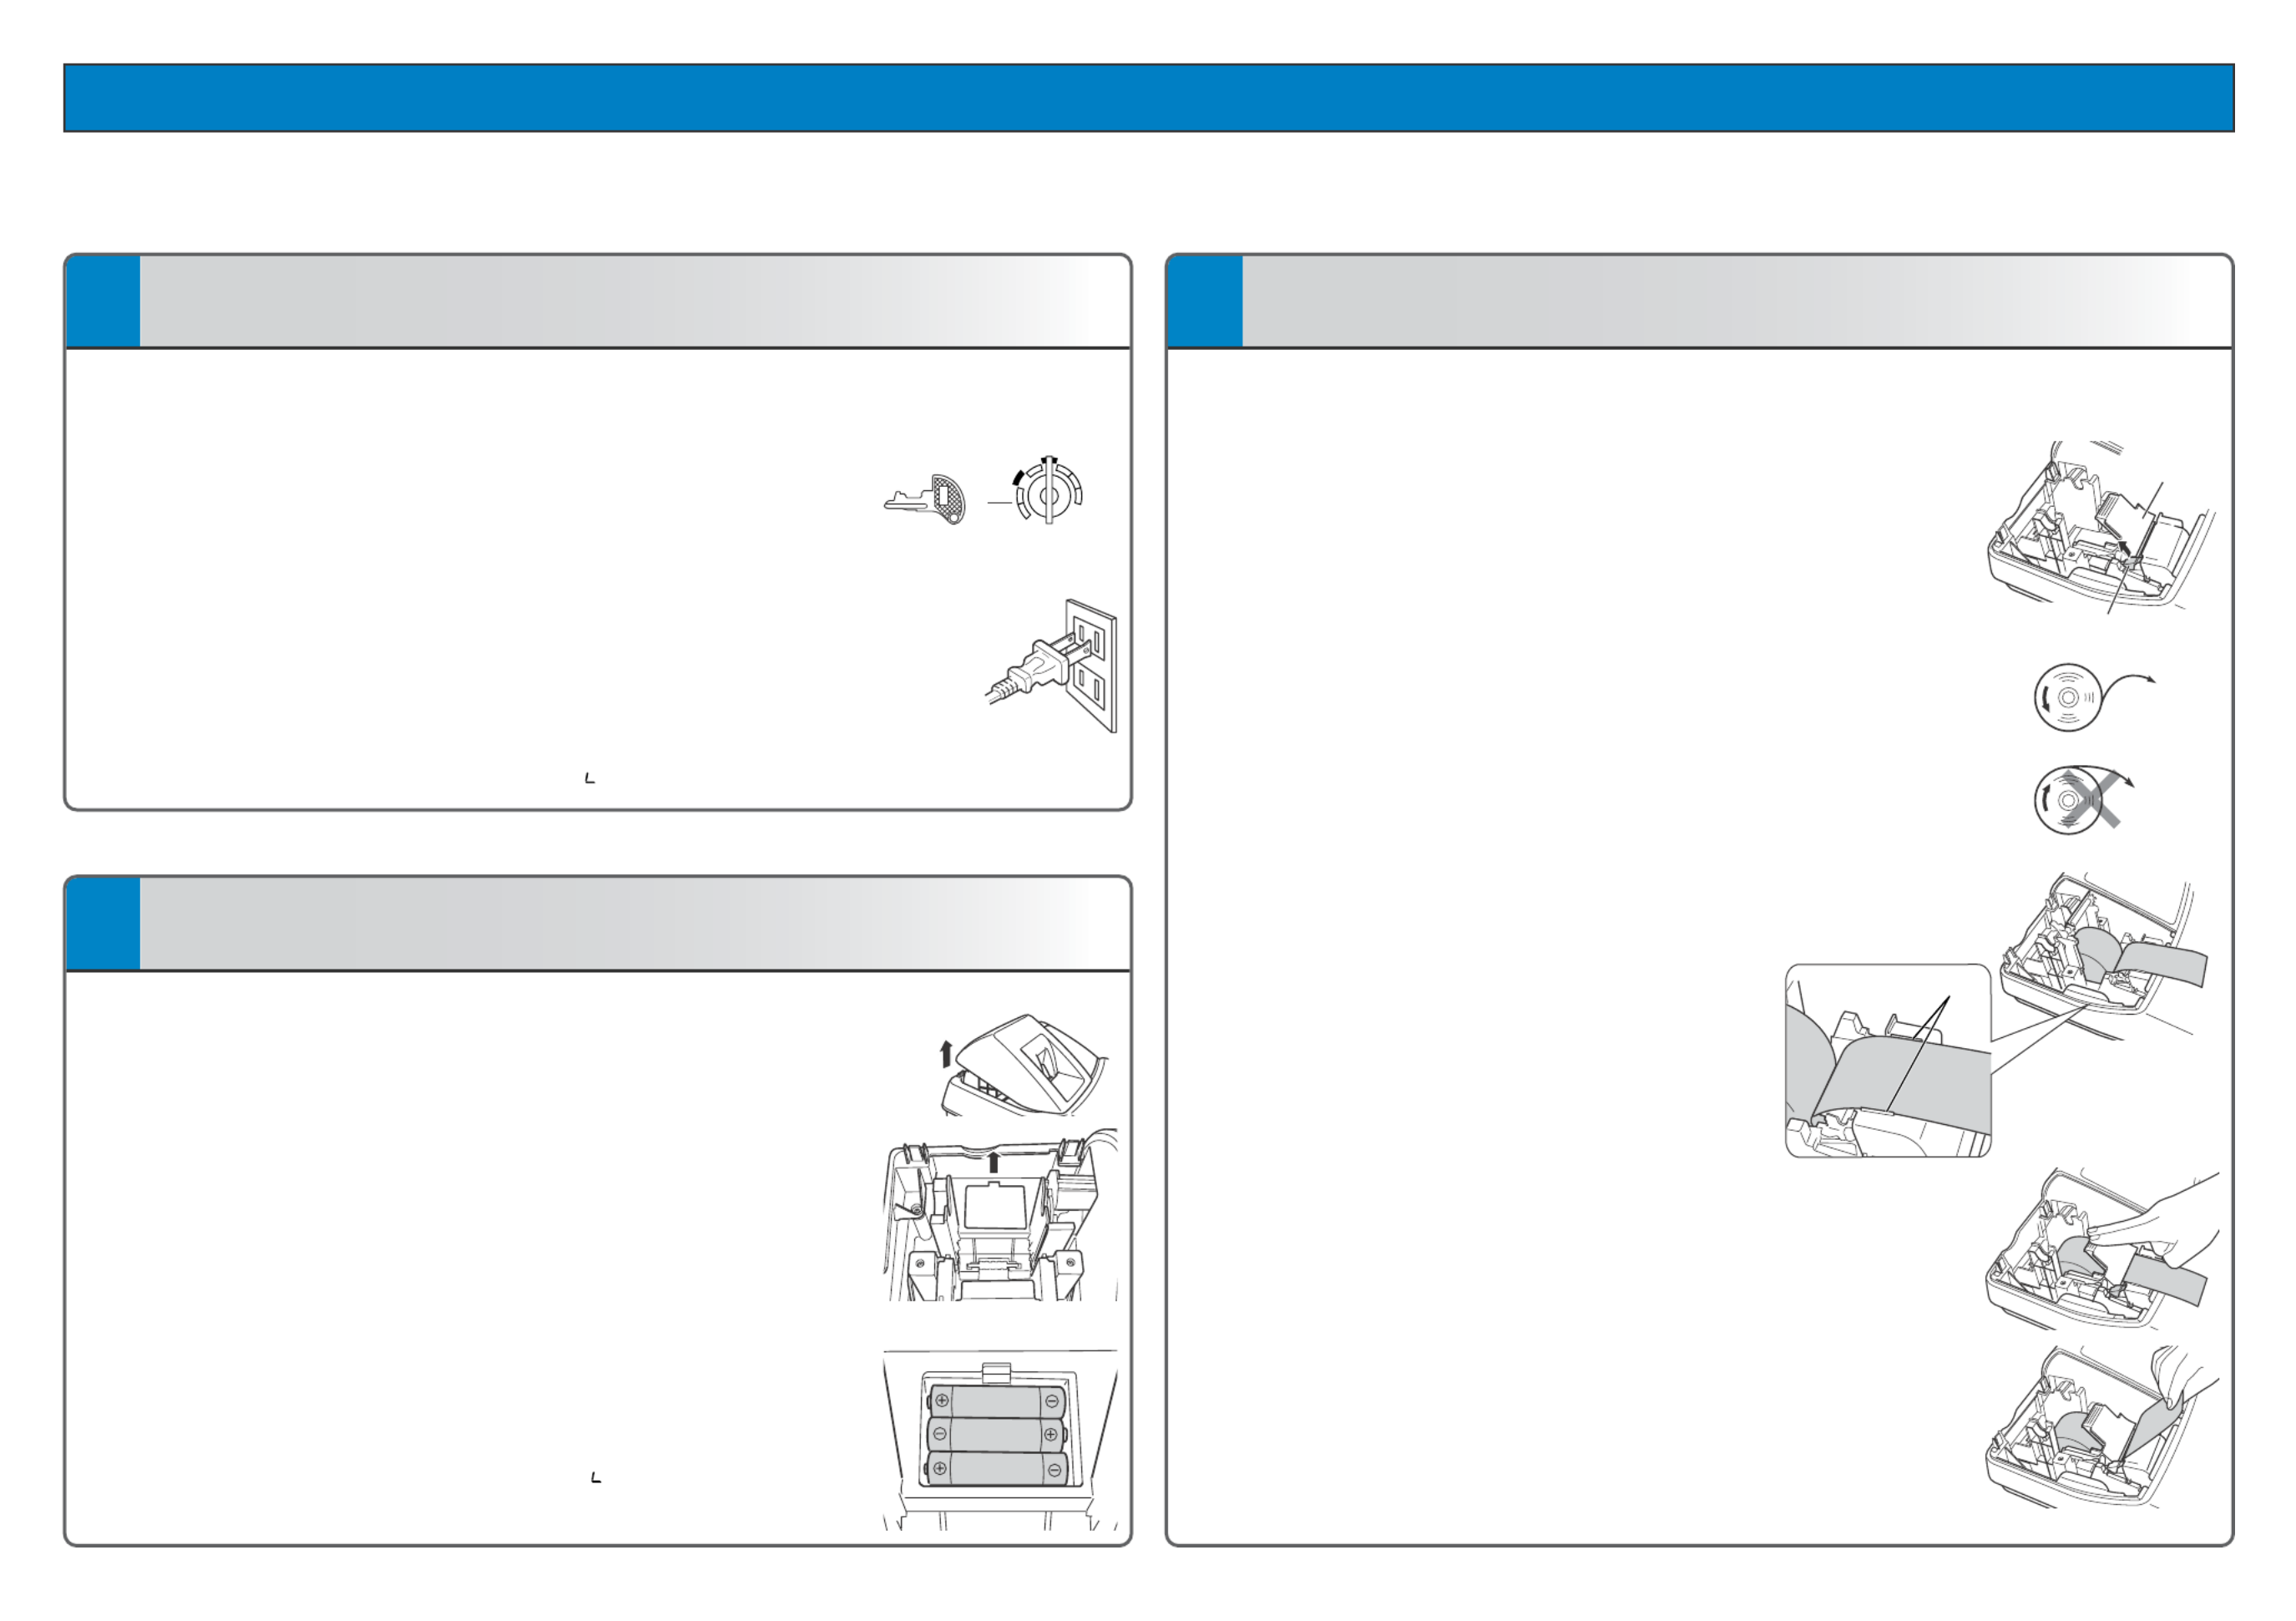
2Installing the Batteries
1. Push the printer cover forward and detach it.
2. Open the battery compartment cover next to the paper roll cradle.
3. Install three new alkaline batteries LR6 (“AA” size) as shown at the
right. (Batteries are not supplied with the cash register.) Make sure
that positive (+) and negative (–) poles of each battery are properly
oriented.
4. When the batteries are properly installed, “ ” on the display will
disappear. Close the battery compartment cover.
3Installing the Paper Roll (for receipt printing)
If you want to use a paper roll for journal printing, please refer to GETTING
STARTED section of the instruction manual.
1. Lift up the print roller release lever to unlock and open the print roller arm.
2. Set a paper roll in the paper roll cradle as illustrated right.
NOTE: When setting a new paper roll in the paper roll cradle, be sure to cut
the paper end behind the taped (or pasted) point in advance.
3. Feed the end of the paper along with the paper positioning guides
as illustrated at the right.
4. While holding down the paper, slowly close the print roller arm, and
push down the arm until you hear a click locking the arm.
Make sure you securely push down the center of the wing part of the
arm as illustrated at the right. The paper will be fed automatically.
5. Cut off the excess paper using the edge of the inner cover, and
replace the printer cover. Press the Fkey to make sure the paper
end comes out of the printer cover and clean paper appears.
NOTE: If the print roller arm is not securely locked, the unit will not print correctly.
If this problem occurs, open the arm, and close the arm as instructed
above.
REG
OPX/Z MGR
PGM
X1/Z1
X2/Z2
OFF
VOID
MA
Print roller arm
Print roller release lever
To the printe
r
Incorrect
To the printe
r
Correct
Paper positioning
guides
Probleemoplossing Sharp XEA-206
Als je de handleiding al zorgvuldig hebt gelezen maar geen oplossing voor je probleem hebt gevonden, vraag dan andere gebruikers om hulp
Specificaties
| Gewicht: | 7394 g |
| Beeldscherm: | LED |
| Cijfers weergeven: | 24 cijfers |
| Tweede LCD-scherm: | Ja |
| Printtechnologie: | Thermische inkjet |
| Type geheugen: | Flash ROM |
| Afmetingen (B x D x H): | 330.2 x 429.3 x 279.4 mm |
| Aantal karakters beeldscherm: | 10 |
| Tweede displaytype: | LED |
| AC-ingangsspanning: | 120 V |
| Betalingsmogelijkheden: | Contant geld |
| Ondersteunde papierwijdte: | 57.5 mm |
| Aantal clerks/departments: | 99 |
| Clerk slot: | Ja |