Kramer
AV extender
AVoIP Manager
Kramer AVoIP Manager Handleiding
Hier is de Kramer AVoIP Manager (AV extender) gebruikershandleiding. 4 pagina's in taal met een gewicht van 1,196,520.0 Mb. Als u geen antwoorden op uw probleem kunt vinden Vraag het onze community.
Pagina 1/4
AVoIP Manager Quick Start
P/N:
2 9 0 0 - 3 0 1 8 4 1 QS
Rev:
1
Scan to go to website
AVoIP Manager Quick GuideStart
This guide helps you install and use your AVoIP Manager for the first time.
Go to to downloadhttp://www.kramerav.com/downloads/AVoIP Manager the latest user manual and check
if firmware upgrades are available.
Step 1: Check what’s bin the ox
AVoIP Manager Collaboration Device
1 VESA mounting bracket
1 Quick start guide
1 Power cords for US and EU
1 VESA screw set
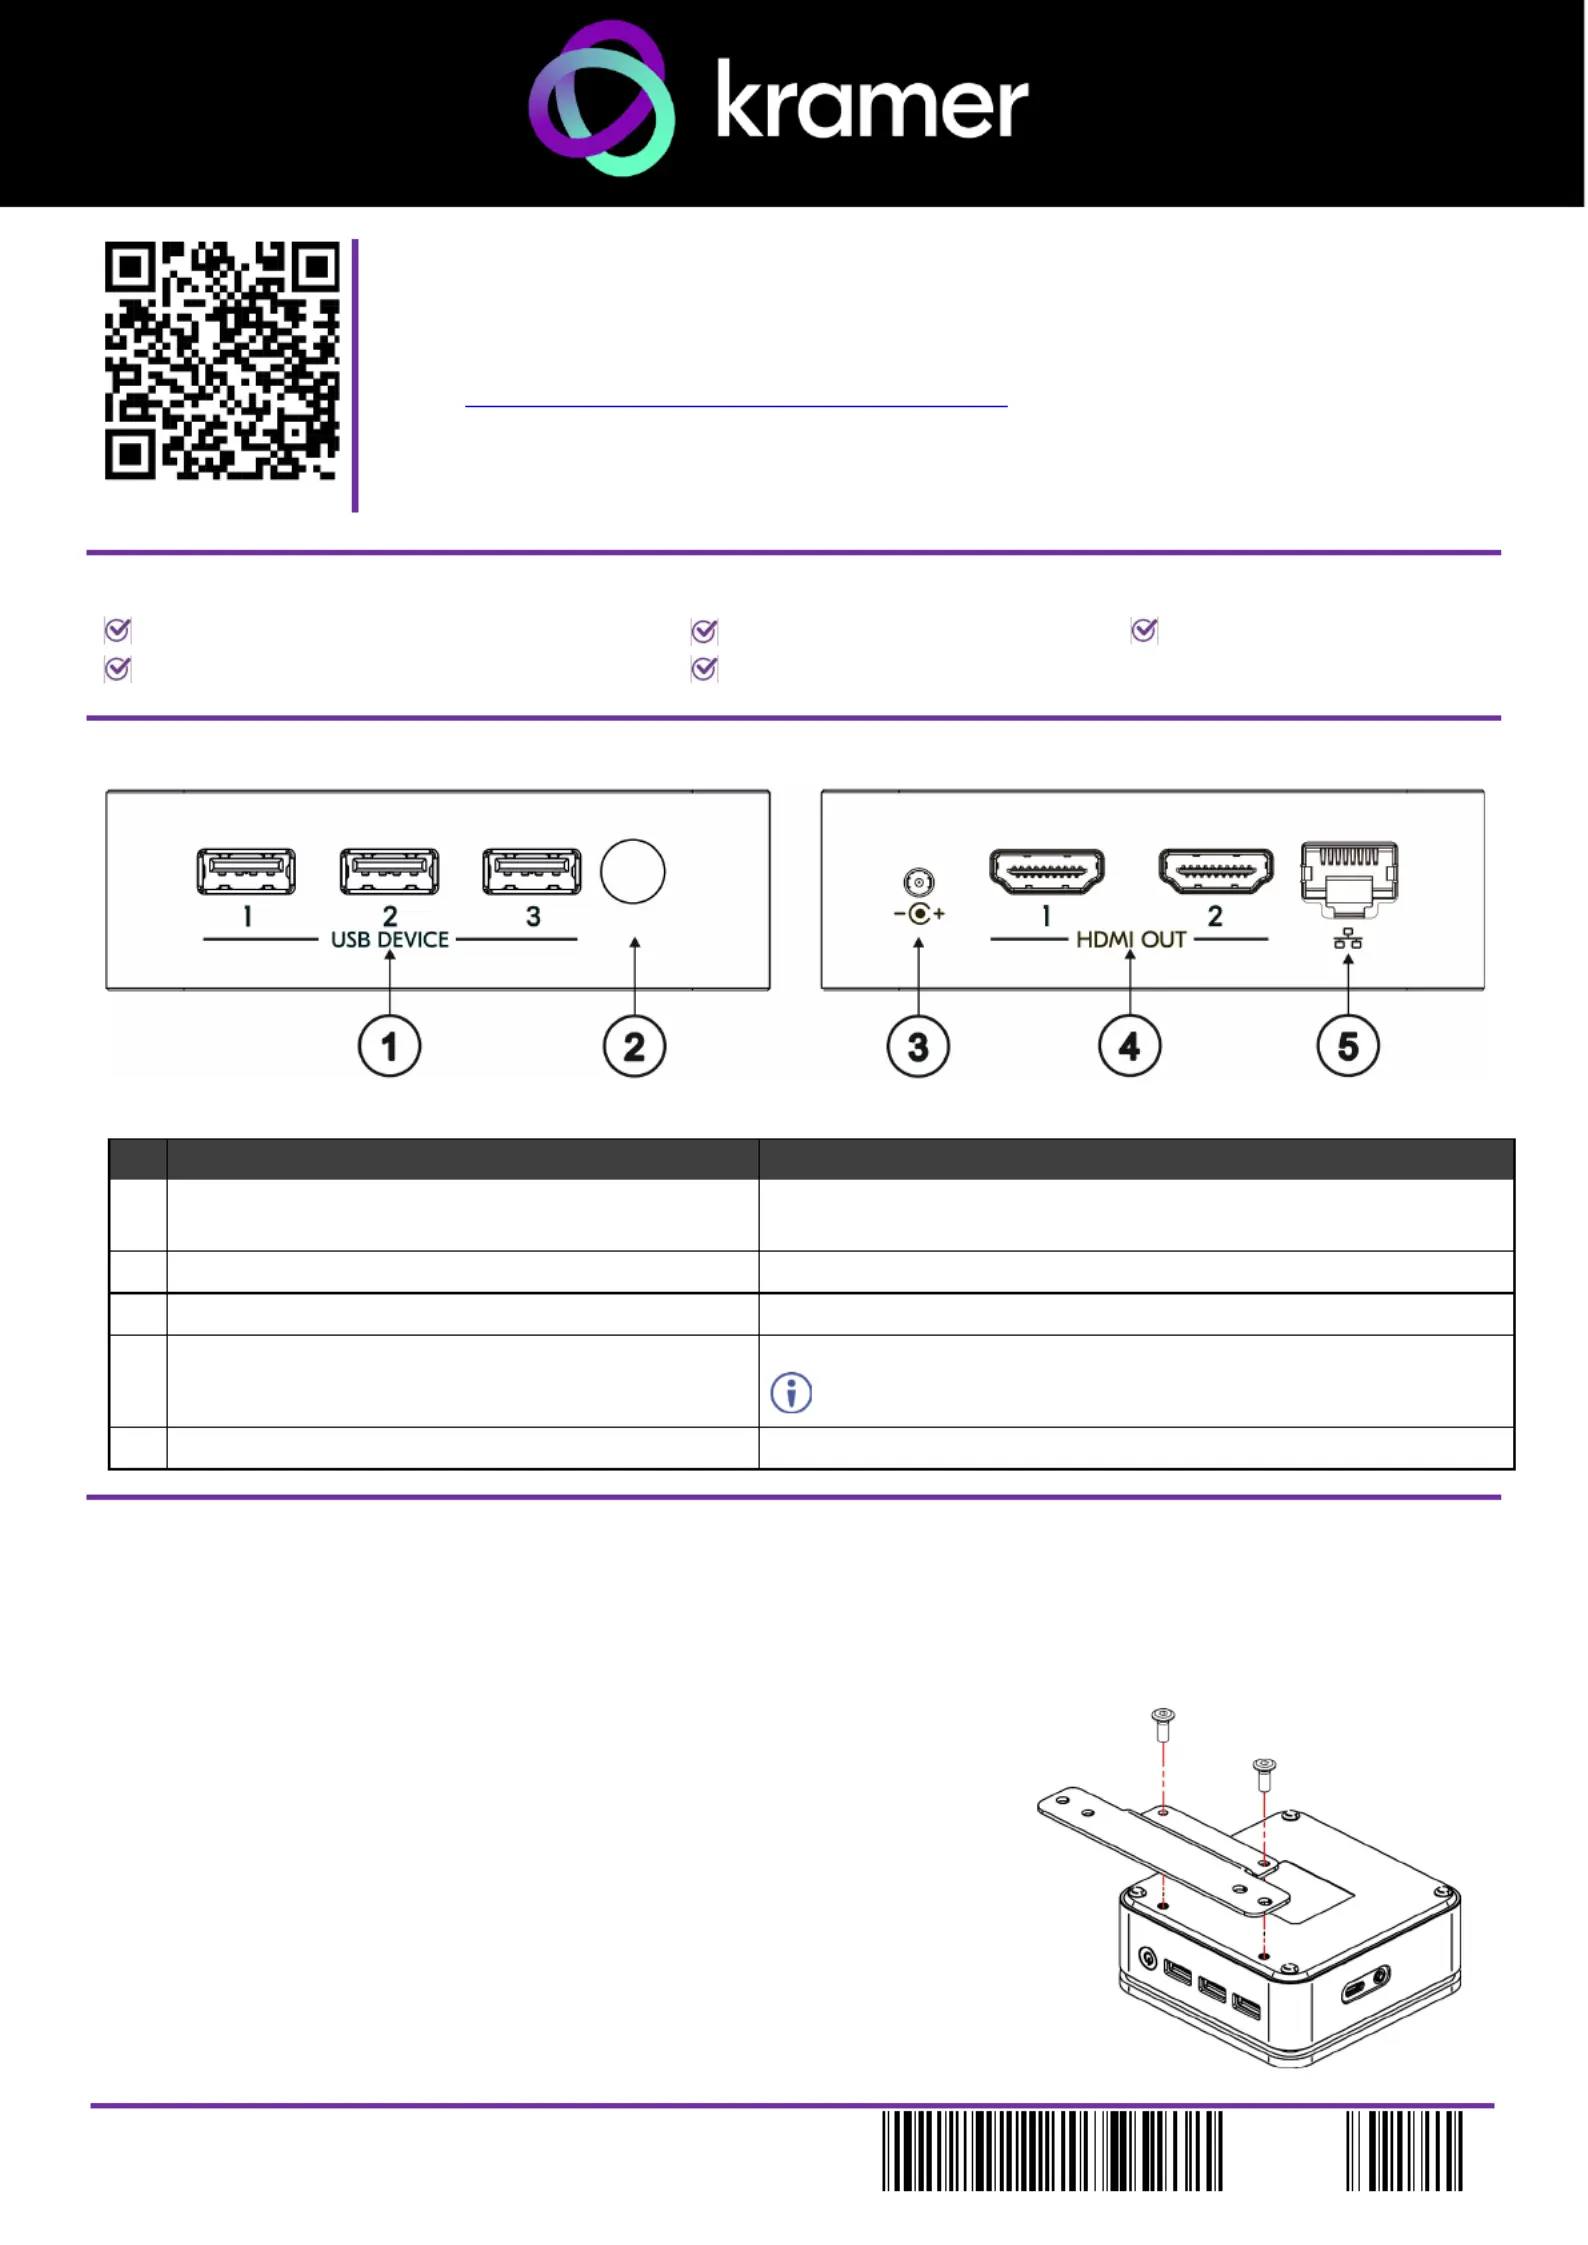
Step 2: Get to know your AVoIP Manager
# Feature Function
1 3 x USB 3.0 Connectors Connect to USB local devices (for example, a USB camera, a
soundbar, microphone etc.).
2 Power Button with LED Press to power ON or turn OFF the device.
3 Power Connector Connect to the 12V DC power supply.
4 1 x HDMI OUT Connector Connect to an HDMI sink.
HDMI OUT 2 is unavailable.
5 - RJ 45 Connector Connect to a LAN (default mode).
Step 3: Mount the AVoIP Manager
AVoIP MANAGER can be installed on a flat surface / wall, rear of a monitor or rack mount using the included
VESA mounting bracket and screw set:
Mount AVoIP MANAGER on the mounting bracket
Attach the mounting bracket 2 AVoIP MANAGER to the with screws.
This step is required for all the options detailed below.
Probleemoplossing Kramer AVoIP Manager
Als je de handleiding al zorgvuldig hebt gelezen maar geen oplossing voor je probleem hebt gevonden, vraag dan andere gebruikers om hulp
Specificaties
| Merk: | Kramer |
| Categorie: | AV extender |
| Model: | AVoIP Manager |